Field Gal Gear

Where’s The Tent?

*indicates products that I have not used, but would be interested to test based on experience and product information.

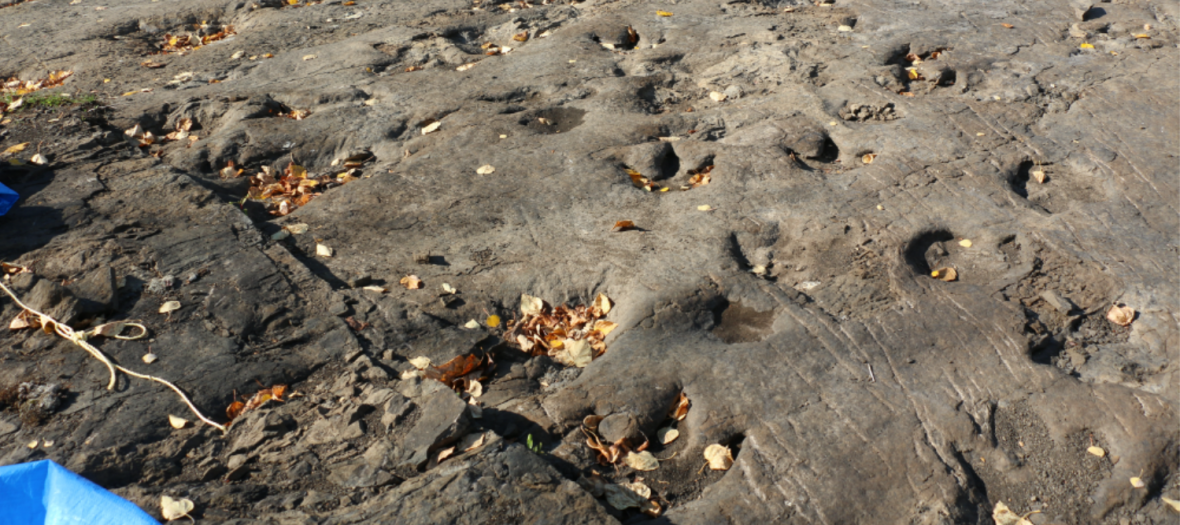
There are two times that I have camped outdoors overnight without a tent. One time was an unscheduled adventure involving a misplaced flashlight, a beaver dam, and dinosaur footprint site in near-freezing temperatures (it was October) with no camping gear AT ALL except for a silicone guide tarp.

The other time was a planned overnight in October with all of the right gear.

One adventure was more enjoyable than the other. I’ll let you guess which one.

A well-planned tent-less camping trip is a fun adventure! There are many tent-less camping systems, like tarps and camping hammocks. I have yet to try these systems, so I’ll talk about what we used on our trip.

There are key pieces of equipment you will need for your tent-less camping trip. You won’t be spending money on anything special: you’ll use all of this gear for tent camping!

  1. The Sleeping Pad

Sleeping outdoors means carrying a sleeping pad. There are a lot of options for backpacking sleeping pads. If you’ve stayed over at someone’s house, you’ve likely used an inflatable air mattress. They can be comfy, but your standard air mattress is just too big and too heavy to bring with you on a backpacking trip.

Think of a sleeping pad as the minimalist air mattress. Sleeping pads aren’t just for a cushy sleep. Sleeping pads keep your body off of the cold-sucking ground while trapping warm air from your body heat between you and the ground.

How warm is your sleeping pad? Check the R-value. The R-value tells you the sleeping pad’s ability to resist heat loss. This means YOUR heat loss. Low R-values (2 and lower) are for warmer climates and summer camping, while medium R-values (3 – 4) are great for three-season camping. If you’re winter camping (or are a cold sleeper) definitely go for a sleeping pad with a 4.5 R-value or higher. A general rule is that the higher the R-value, the thicker and heavier the sleeping pad will be. Don’t despair! We’re talking about a difference in between one and two kilograms, not dozens.

There are different types of sleeping pads: self-inflating, manual-inflating, and closed-cell foam pads. I’ll talk about what I know, which are self-inflating pads.

Self-inflating sleeping pads have a foam core. You can fold them in half lengthwise and then roll them up into a tight roll. When you roll up your sleeping pad for travel (and put it in the stuff sack), you squeeze all of the air out of the foam cells. When you unroll the pad, the empty foam cells expand and suck in air through the inflation valve. All you have to do then is breathe into the valve to get your sleeping pad just the right firmness, close the valve, and you’re set!

Pro-tip: Get yourself a silicone bag, like the MEC Pack Rat Silicone Stuff Sack, for packing your sleeping pad. Silicone bags, like a non-stick pan, glide easily over the rolled-up sleeping pad. This means you can pack and unpack quickly (and without frustration!)


Pack Rat Silicone Stuff Sack
Pack Rat Silicone Stuff Sacks. Numbers indicate liters of space.

I’ve always used a self-inflating sleeping pad. I’ve never had one deflate on me overnight (if you’ve slept on a standard air mattress you know the feeling). My absolute favorite is the Therma-Rest Prolite Plus Women’s Sleeping Pad. This pad has been with me for ten years. TEN YEARS. Its R-value is 3.9 so it’s great for three-season camping. I’ve used this pad in the sub-alpine where the temperatures dropped to -5 C at night in August (yup, it gets cold up there!) and I didn’t feel the ground sucking my life-energy from my soul.

ThermaRest
ThermaRest ProLite Plus Women’s Sleeping Pad

Air pads* are extremely light and pack down quite small. You need to manually inflate them, but the air pump is actually a lightweight bag pump. They come in a range of R-values and pack down super-duper small. As with self-inflating pads, air pads with higher R-values tend to be a bit more spendy.

  1. The Sleeping Bag

Idyllic as it may seem, sleeping under the stars wrapped in your cloak like a hobbit off to visit the Lonely Mountain is not going to cut it, comfort-wise.

Adventure
Yeah dude, you’re totally getting rained on at night. I’ve read “The Hobbit” a floppity-jillion times. I know what’s in store for you!

You’ll want a sleeping bag. Look, I’ve made due with a fire, a guide tarp, and a pile of leaves. OK, maybe not a pile of leaves, but that was an … unexpected journey.

Not all sleeping bags are created equal. Sleeping bags, like sleeping pads, have ratings. Sleeping bag ratings are given in temperatures. A -10 C rated sleeping bag is going to be a lot warmer than a sleeping bag rated at +5 C. For three-season tent-less camping in temperate climates, you’ll want a sleeping bag that is rated for below freezing temperatures.

Pro-Tip: The temperature rating on a sleeping bag doesn’t mean that you will be snug as a bug in a rug using the bag at that temperature. It means that you will SURVIVE at that temperature. It’s a country mile between comfy and surviving.

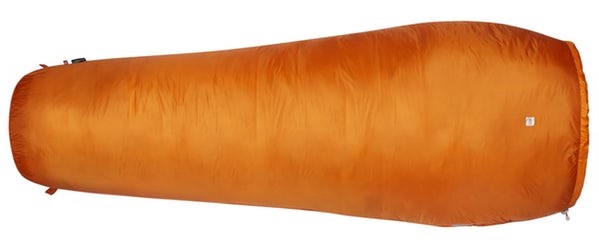
Personally, I like a down sleeping bag. They compress down beautifully in a compression stuff sack for stowing in your pack. Down is crazy warm for its weight. Down is also very durable: a well-cared for down sleeping bag will last over a decade. My old MEC Raven -7 C Mummy Bag is still going after fifteen years.

Down sleeping bags have their drawbacks. One, they’re a little heavier than a synthetic bag. Two, once it gets wet, it’s game over for warmth, and they take a long time to dry out. You have to think like a duck to get the most out of your down bag. A duck has its down feathers right up against its body, protected by the water- and wind-repellent layer of their contour feathers. The contour feathers also keep all of those toasty little air pockets trapped within the down close to the body.

So how do you keep either your down (or your synthetic) bag warm and dry when you camp without a tent? You need layers over your down, my duckies!
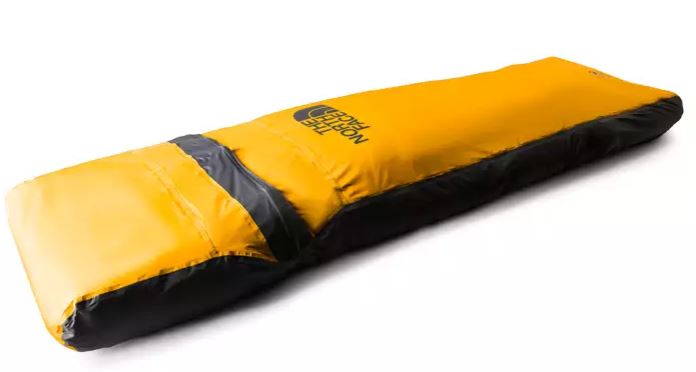
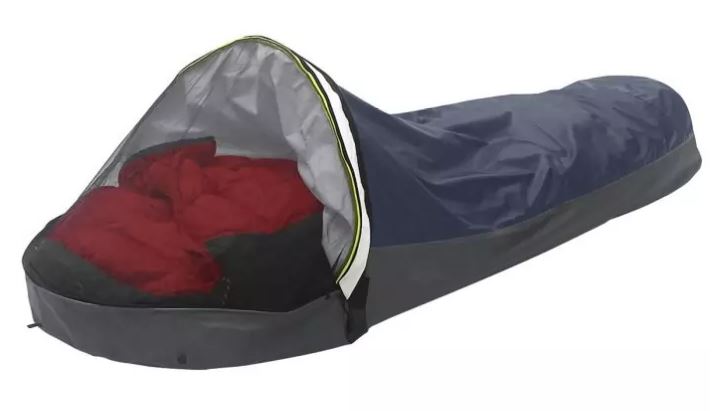
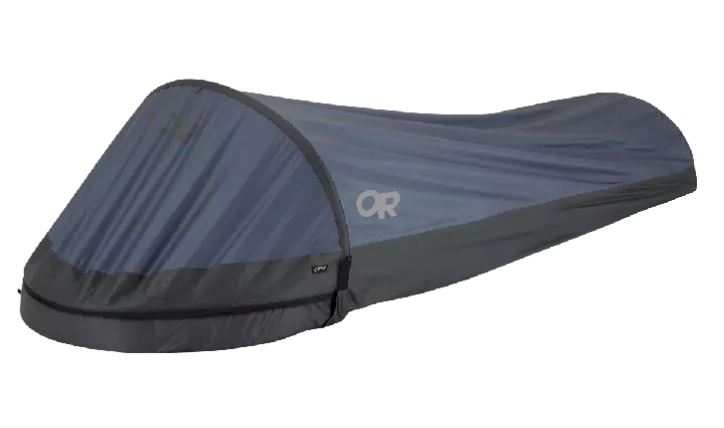
  1. The Overbag

Ducks keep wet out of their down feathers by preening: they rub oil over their outer feathers which repels moisture…like water off of a duck’s back (c’mon, I had to!) We’re not about to slather our sleeping bags with butter, so we need a fabric option.

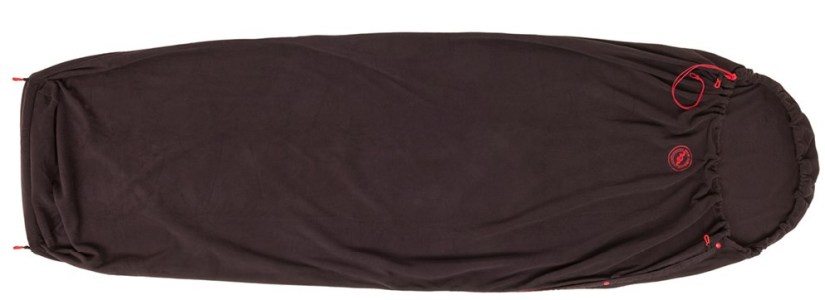
An overbag acts like the contour feathers on a duck: it keeps the wind and external moisture off of the bag. It also helps to trap in your body heat. You can add another 5 C to 10 C degrees to your sleeping bag’s rating with a wind-stopping overbag. I have a MEC Emperor Penguin Windstopper Overbag (no longer available).

Penguin Overbag
MEC Emperor Penguin Windstopper Overbag

If I needed to pick up a new overbag, I’d be interested to try out either the North Face Ocelot Overbag* or the MEC Talon Overbag*. They are comparable in price and both do what overbags are supposed to do: keep condensation away from your body and your main sleeping bag while repelling external water.

Ocelot Overbag
North Face Ocelot Overbag. This looks TOASTY!
Talon Overbag
MEC Talon Overbag. Also looks toasty!

I had my sleeping pad, my sleeping bag, and my overbag, but what if it got really chilly at night?

  1. The Sleeping Bag Liner

You can add even more warmth to your sleeping system by adding an inner layer! You can get fancy-shmancy with wool and silk liners, but I went for the least expensive one I could find, my MEC Fleece Sleeping Bag Liner (no longer available).

The polyester fleece wicks away sweat, adds a bit more warmth to your bag, and keeps the inside of your main bag a bit cleaner (it’s so much easier to wash the fleece liner than a down sleeping bag). If I needed a new bag liner, sign me up for the Big Agnes Fleece Sleeping Bag Liner*.

Big Agnes Fleece Liner
Big Agnes Fleece Sleeping Bag Liner

It’s made of Polartek recycled fleece and adds another 5 C – 10 C to your sleeping bag. Oh, and can I say that snuggling up in a cozy fleece blankie at the end of the day feels like luxury? Because it does!

What if you’re worried about all of your gear directly touching the wet ground? Or WHAT IF IT RAINS ON YOU AND YOUR GEAR?
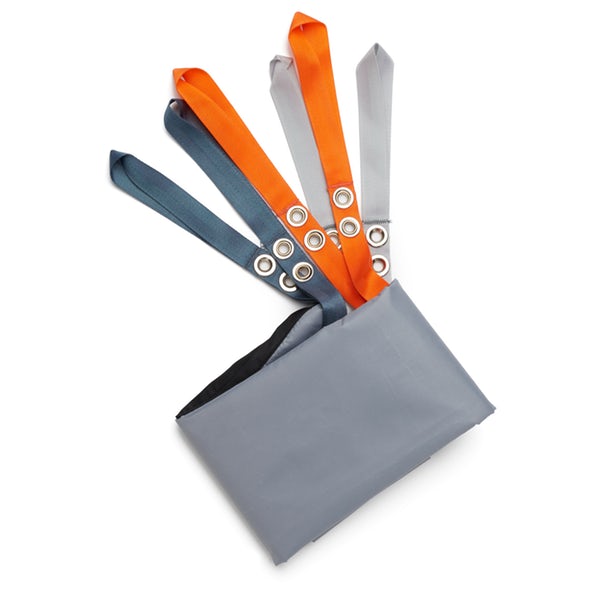
  1. The Siltarp

Siltarps are basically a piece of nylon that is impregnated with silicone. They’re very light and waterproof. My very first paleontology survey in the alpine demonstrated the necessity of a backpack tarp. It was a gorgeous August day, but when we reached the summit of a mountain the weather turned FAST. We were caught in a freak snowstorm. One of our group pulled out this teeny package from their back, unfurled it, and lo! A giant tarp covered us and our gear, keeping us dry. Staying dry meant we stayed warm, and staying warm means avoiding hypothermia.

I picked up a backpacking tarp immediately after returning from this trip. The Rab Guides Siltarp 1 is very similar to the tarp I have.

Siltarp
Rab Guides Siltarp 1

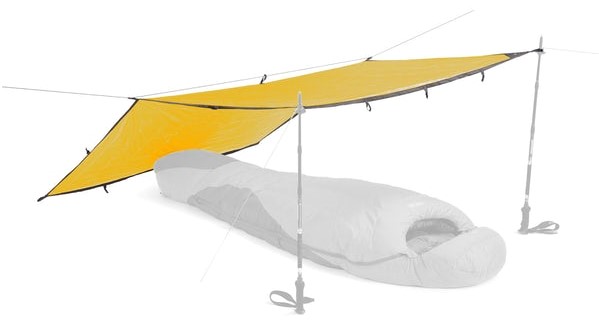
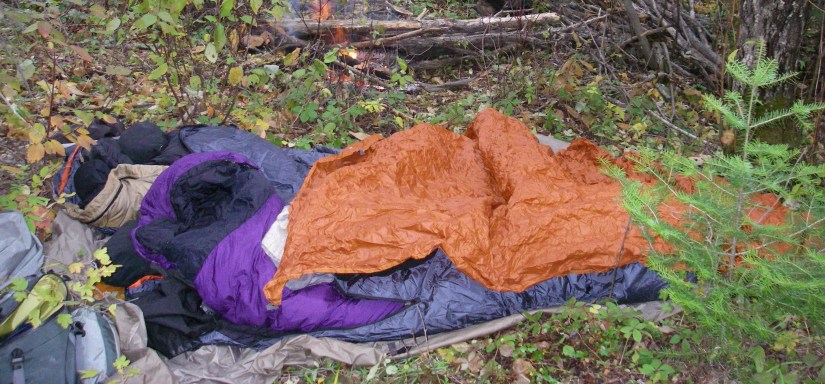
Siltarps weigh less than a 1-liter water bottle and take up very little room in your pack. My siltarp is a must-have for every paleontology survey or hike. When we did our tent-less camping trip, we put our sleeping gear on one guide tarp, and used the second guide tarp as an emergency rain shelter. Thankfully it didn’t rain!

Tentless camping
Our tent-less camping trip!

You can definitely get away with using a regular polytarp (those blue tarps that make loud crinkle noises) that you can find at your local hardware store, but they won’t pack up as small and won’t be as light. Siltarps are also less expensive than tarp shelters. You can turn your siltarp into a shelter by hooking the side loops over your hiking pole (the subject of a future post!) or running nylon cord through the loops.

I consistently use all of the gear in this post. When I camp in my bivy sack in the sub-alpine, I don’t even bring my sleeping bag: I use my sleeping bag liner and my overbag (and wear warm undies, which I would bring regardless.)

Wish List

One piece of tent-less camping gear I am extremely eager to try is the camping hammock! Hammocks that hook up to trees would not work well in the sub-alpine or the alpine: the trees are just too teeny. I would use a hammock for lower elevation forest camping. Camping hammocks vary in price: this depends on whether the hammock comes with a rain fly. Since I already have a siltarp that I would use as a rain fly, I would love to try out the MEC Double Hammock with Tree Straps*!

Hammock
MEC Double Hammock with Tree Straps

I’d still want to use my sleeping pad, overbag, and sleeping bag liner when sleeping in a hammock. There would be cold night air underneath me, so insulation would be a must.

Have you ever gone tent-less camping? What sort of gear did you use? Did you ever have an unexpected tent-less camping trip? Tell me about your adventure!

Field Gal Gear

Itsy Bitsy Teeny Tents

*All gear marked with an asterisk is gear with which I have no experience. I base my review on what I know from using similar gear.

You can’t think “camping” without thinking about tents. It’s like thinking about peanut butter without the chocolate, or gin without the tonic. Some things just go together.

When you’re carrying EVERYTHING on your back, you need to maximize your stuff and minimize the weight in your backpack. It’s less of an issue if you’re paddling or being shuttled by helicopter to your outdoor destination. Sure, there are still weight restrictions, but you have more room to bring stuff. More room for luxuries like a big four-season tent.

Nunatak 1
Older model MEC Nunatak 3-Person 4 Season Tent.

The MEC Nunatak …wait. This version is no longer available? Dang! The Nunatak is our go-to tent for alpine and sub-alpine work. I haven’t had the need to purchase the newer model of the MEC 3-Person 4-Season Nunatak because the older model has held up SO WELL! Seriously: our Nunatak is a decade old! I would expect the same performance from the new model of the Nunatak:

  • Sturdy against strong mountain winds and snow (yes, it snows in the mountains in July and August)
  • Holds in your heat when the night temperatures drop to around 0°C
  • Two entrances with large vestibules for storing sodden and muddy gear
  • Enough room to hold two people plus all of their gear comfortably
Nunatak 2
Newer model MEC Nunatak 3-Person 4 Season Tent*. It looks even more sturdy than the previous version! I like the skirt along the bottom of the vestibules!

Pro tip: when you see the person-capacity listed for your tent, that capacity is for people WITHOUT their gear. Count your gear as taking up the space that half a person would, especially if you’re camping in a very cold or wet environment. More weather, more gear.

Being both large and sturdy, this tent is NOT what you want to have in your backpack (or two packs, or three packs) when you have to haul yourself up a mountain or along boulder-strewn terrain. When you only have your arms and legs to power you, you start to look at small, lightweight shelters.

  1. Two-Person Tents

My husband and I have three solutions to lightweight, hike-it-in shelters. One is a two-person tent. The MEC Tarn 3 is our active two-person tent.

Tarn 3
MEC Tarn 3 3-Person Tent. While discontinued, this was perfect for two people and our gear.

Since the Tarn 3 (and the slightly smaller Tarn 2) are no longer available, I started looking at other kinds of two-person tents. Here is my mental checklist when I browsed the new tent models:

How cold is the area you’re camping?

There are small tents that are super light, but the top of the tent is all mesh, like the Big Agnes Seedhouse Superlight 2-Person Tent*. Tents like the Big Agnes and other tents described as “super-light” will have large mesh panels in the fabric. The upper part may be completely constructed of mesh. The fly will not be enough to hold in your body heat, so this is a tent for warmer climates, or if near-freezing temperatures won’t be an issue for you. Don’t just use tent weight as your deciding factor: you might end up sacrificing your warmth for weight.

If I needed to buy a new 2-person tent for cool weather camping in the alpine, I would go with the MEC TGV 2-Person 4-Season Tent*.


TGV
MEC TGV 2-Person 4 Season Tent* with rain fly. 

The TGV has mesh doors, but the rest of the tent is constructed with 40-denier polyester. This, combined with the fly (a.k.a. the tent cover or rain cover), will help hold in your body heat.

TGV 2
MEC TGV 2-Person 4 Season Tent* without the rain fly. The less mesh you see in the tent body, the warmer the tent will be.

Pro-Tip: Denier lets you know how see-through polyester products are. 30-denier and higher means the fabric is opaque. That’s it! That’s all it means!

How windy is the camping area? The TGV is wedge-shaped, so you can set up the pointy end against the prevailing wind. Point the low end of your tent towards the direction that the wind is coming from. The wind will have less surface area to smoosh. Winds on mountain tops are STRONG. Winds will plow your tent over or bend (or break!) your poles if you bring up a tent that is meant for a low-altitude campground. Dome and box tents will get smooshed…with you inside. I have stories.

Where will your gear go? There’s a roomy vestibule for storing your boots and pack out of the weather. The entrance flaps can be fully closed for extra warmth, or you can use just the mesh flap for ventilation. Although designed to stand up to foul weather, the TGV is still lightweight at 2.75 kg.

Use a tent footprint (no question).

Ground sheets, or tent footprints, are essential. They keep moisture from seeping through the tent bottom and into your sleeping gear. Footprints are usually sold separately. Each tent brand and model should have a tent footprint available specifically for that tent. Bonus: the tent footprints have grommets that fit the ends of your tent poles, and WILL HAVE THE SAME COLOR CODING AS YOUR TENT POLE GROMMETS. You don’t have to worry about setting your footprint down bass-ackwards!

Here’s the footprint for the MEC TGV 2-Person 4-Season Tent.

TGV footprint
Footprint* for the MEC TGV 2-Person 4-Season Tent. Look at the color-coded pole straps!

Waterproof your tent fly and tent base (also no question).

Seriously. You can get away with an unwaterproofed tent for a couple of uses, but you will notice seepage and leaks over time, especially on the tent floor. Talk to the store from where you buy your tent to see what they recommend for waterproofing products.

What If I’m Not Sharing A Tent?

You may want your own sleeping space. You’re in luck! You have a few options for one-person shelters.

  1. One-Person Tents

If I was to buy a one-person tent that would suit my needs for cool weather camping, I would check out the MSR Elixir 1-Person Tent*. At 2.16 kg of packed weight, this tent has great features for its price ($255 CAD). The Elixir has a full polyester top, which is great for holding in your sleeping warmth. The rain fly has a roomy vestibule for storing your pack and boots outside of your sleeping space. This is necessary: there will be no room in your tent for both you and your pack.

MSR Elixir

MSR Elixir 2
MSR Elixir 1-Person Tent* with rain fly (top) and without (bottom).
  1. Bivy Sacks

Maybe you want a super small, super light, but still super weather-proof shelter. Enter the bivy sack!

I am a claustrophobic sleeper. I cannot abide blankets covering my head and face, no matter how cold it gets. This was a real struggle for me when I was a little kid: it was hard to hide from bedroom monsters if I couldn’t sleep completely under the covers!

Blanket snorkel
The Far Side, by Gary Larson

My husband (also claustrophobic) tried a traditional-style bivy during his fieldwork. The bivy was similar to the North Face Assault Bivy*. He said it was a bit like sleeping in a body bag. The bivy fabric was RIGHT THERE AGAINST HIS FACE. I was NOT excited about the idea of dropping serious money on a bag that would give me smothering feelings.

North Face bivy
North Face Assault Bivy*. It’s light and compact!

But I was still enamored with the IDEA of itsy bitsy shelters. I did a week-long geology field trip to the Black Hills of South Dakota during one of my undergraduate geology courses. Our lab section’s graduate teaching assistant had this awesome looking tent that was so much smaller than a tent, but larger than a traditional bivy bag. I was intrigued, but completely too self-conscious to ask her about it. Her shelter represented what I wanted my camping to be.

In 2010 my husband and I went on a week-long rafting trip. Space and weight were limited: we could bring what would fit in our backpacks. We started looking at one person tents, but at the time they were pricey. Then we saw the Outdoor Research (OR) Alpine Bivy.

Bivy 1
Outdoor Research (OR) Alpine Bivy. I love this bivy sack!

It’s like a sleeping bag and a tent joined forces. LOOK AT THE HEAD ROOM!

The whole packed OR Alpine Bivy takes up as much space as a one-liter water bottle, and weighs a little less (564 grams). There is a mesh screen for when you want to sleep with the lip open. When it rains – and it rained on our rafting survey…heavily…every night – the lid is supported by two small tent-style poles that hold its shape. It feels like sleeping in a tent! You can zip yourself up like a caterpillar in a polyester cocoon! Confession: I snapped the poles in place backwards so my lid couldn’t fully open, but I STILL had a completely dry and comfy sleep!

bivy 2
Outdoor Research OR Alpine Bivy with the opening closed against rain. Don’t you want to put googly-eyes on the lid? I know I do!

One thing that took me a few moments to get used to was that I could FEEL the pressure of the raindrops on my back and legs. After I got over the few second panicked feeling of “AAH! I’M BEING RAINED ON!” I thought of it as a gentle massage and fell back asleep.

The expanded head space had room for my clothes (I used my clothes as a pillow), field book, and electronics. There was NO ROOM for my pack and other gear. I made sure that the rain cover for my pack was snug before going to bed, and my pack made it through the night bone dry!

But what if you want to go even lighter? So light, in fact, that you want to forgo using a tent at all?

That’s MADNESS, you may say, but it’s done and I’ve done tent-less camping! On my next post I’ll talk about the gear I used to make my tent-less camping trip a comfortable success! I’ll also show you some gear that I would be very interested to test for tent-less camping!

Field Gal Gear

Packity-Pack! (Don’t Use A Cheap Pack!)

If you weren’t exposed to, or didn’t have the opportunity to experience – outdoor activities, it can be a steep learning journey to find out what works and what doesn’t. I didn’t grow up in an outdoor-gear family. We spent A LOT of time outside, but that was because I grew up in a rural area. We didn’t go on camping trips or epic hikes that required specialized gear. When I started doing palaeontology work in 1997, about 23 years ago…

…is it really 23 years? My calendar must be incorrect. The 90s were only ten years ago, right? RIGHT?!?

Anyway, when I started doing field work AN UNSPECIFIED NUMBER of years ago, my first ever field backpack was a Coleman insulated day pack that my family gave me for Christmas. It was a great idea: they wanted me to be able to keep my lunch cool in the badlands of Alberta.

  1. My Very First Outdoor Backpack

Here’s an image of a Coleman backpack cooler. My circa 1997 pack did not have hip/waist straps, bottle holder, gear webbing, or multiple pockets: it claimed to be nothing more than it was, which was a cooler with backpack straps.

Backpack cooler

It worked! The field work was a series of day trips. We returned to the base station each night, and we never had to hike several kilometers to anything. The pack did its job, and I used it until it fell apart in 1999. By the time I started doing field work in Montana during my undergraduate degree, I needed a new pack.

  1. My Budget Backpacks

I was on a VERY TIGHT budget during my undergraduate studies. Example: I tried to keep my meal costs below $5 per day. I ate A LOT of Campbell’s Tomato Soup and oatmeal (not mixed together: I’m not a monster). I added Ramen noodles to the soup when I wanted something fancy. My idea of eating out was 99 cent bean burrito night at Taco Bell. I was not going to throw serious money at a serious backpack. I went with the $30 book bags at the university book store because it was what I could afford at that moment.

Book bag

Here’s an example of a book bag backpack, the MEC Process Bookbag. Budget-friendly and roomy enough for your electronics and books, it’s great at what it is designed to do, which is to carry your electronics and books. That’s it. Notice the lack of waist straps? It is NOT meant for an expedition-length outdoor survey. Expecting a book bag to do more than a book bag does is unfair in terms of a performance review.

I made my book bags work. I crammed those packs full of everything I needed for a full day of excavating and several kilometer surveys. I NEVER connected my neck, shoulders and back pain with the design of my pack. I just thought it meant that I wasn’t tough enough. If I kept at it, I would toughen up, right? Was I ever wrong!

I didn’t know any better. I didn’t know there were actual expedition packs that are designed to take the weight off of your shoulders and transfer it to the main load-bearing parts of your body: your hips and legs. It’s why you always hear “Lift with your legs, not your back!”

Between 1999 and 2003, I blew through five book bags in five years. At a minimum of $30 per bag, I spent $150 (likely more) on backpacks. Had I known; I could have dropped that coin on one bag that would last me several years. Had I known. You end up spending MORE money on cheap gear over time than you will investing in a pack. If you’re cash-strapped, you have no choice: you just don’t have $150 or more laying around. It’s bloody expensive to be poor.

  1. My First Serious Big-Girl Backpack

In 2003 I switched projects. My new colleague took one look at what I was using for a backpack and said “Dear God, that’s not your pack, is it? Nope, we’re going shopping tomorrow!”

That was my first-ever trip to an outdoor gear store, Mountain Equipment Co-Op.

There were three key features my colleague educated me on:

  1. PADDED WAIST STRAPS. These are they key feature that helps you carry the weight of your pack on your hips (as long as your pack is sized properly.)
  2. PACK FRAME. Does your pack hold its shape, especially the part that rests right against your back? This is super important for keeping the contents of your pack from digging into your back, because the frame holds the gear slightly away from your resting directly on your spine.
  3. HOW DOES IT FEEL? Any respectable outdoor store will help you size your pack and let you test it out in-store under weight. They have sandbags that you can load into your pack and take it on a jaunt around the store. If the store has an outdoor footwear section (they usually do), they should also have a sloped ramp you can walk on. That will give you a good feel for how your pack handles when you’re going uphill or downhill (it matters!)

This MEC Forge 40 Backpack is similar to the day pack I purchased seventeen years ago on super-duper clearance sale. It’s still one of my active day packs.

Day pack

I was in backpack heaven! What a difference a pack with waist straps and a frame made! Although we were only doing day expeditions, at the end of the day we had to hike fossil samples up a fairly steep hill. We started off calling it The Hill of Pain. By the end of the field season we were so used to the hill that we renamed it the Hill of Mild Discomfort. I had much more painful hills in my future.

  1. My First Expedition Backpack

I was soon doing in surveys and expeditions that required hiking with a load of camping gear, tools, and recovered fossil samples. Fossils and gear are heavy!

This requires an expedition pack. I bought my very first expedition backpack in 2004: the MEC Brio 60 (no longer available).

brio70

I love this pack! I STILL use it! It keeps coming back for more, even after all of the horrid abuse I have inflicted upon the fabric of its soul. It was on sale for $99 when I bought it. It is very simple in its design. The features that I love:

  • Generously padded waist straps
  • Removable pack frame (it’s a little tricky to get back in place)
  • Simple interior partitioning
  • Side access zipper for the main compartment
  • Removable top lid with built-in waist straps

The Brio 60 is not a light pack when its empty because of the pack frame, but that frame is essential. We only had to carry fossils from their discovery site to a cache for helicopter pick-up, but first we had to CARRY them to the cache. The heaviest fossil I put in my pack was over 70 lbs. My colleague hauled a dinosaur thigh bone in his bag that weighed over 180 lbs over a three-kilometer trail (not recommended: he was looking a little green at the end of that haul). These packs get the job done.

  1. My First Expedition Backpack Designed for Women

I had tiny issues with the Brio 60. I felt a decent amount of my pack’s weight on my shoulders no matter how I adjusted the waist and shoulder straps. You’re never going to avoid carrying some of your pack’s weight on your shoulders. There are newer backpack designs that do this better, and backpacks designed for women have this as a main feature.

I took advantage of a backpack sale and bought a Gregory Deva 60. I went all in and used this pack for the first time on a 5-day hike-in fossil survey. I was not disappointed!

Gregory

The compartments make sense! There is a roomy main compartment with the option of partitioning off a smaller lower compartment for a sleeping pad and bag. There are two roomy side pockets, and a deep front pocket which I used for storing my on-the-go snacks and the resulting snack trash (pack it in, pack it out!) The top pocket fits snugly over the main opening whether the pack is full or empty. The pack is also designed to use a 3- liter hydration system (purchased separately).

The best features are the lightweight pack frame, structured shoulder straps, and padded waist straps.

My pack had a lot in it! An Outdoor Research Alpine Bivy, sleeping bag liner, sleeping bag overbag, a couple of changes of thermal leggings and shirts, several pairs of wool socks (always wool socks!) rain jacket, three liters of water (we also packed in a water purification system because we knew that water would be available on site), food for five days (including a small bottle of homemade mead), field book, GPS, bottles of glue, digital camera, hiking pole, rock hammer, first aid kit, rain jacket, pack rain cover…I had to live out of this pack for five days.

My pack was still heavy, but it felt good. There was literally a weight being lifted from my shoulders!

What is your favorite large backpack? Do you have an old trusty pack that just won’t quit? Do you have backpack horror stories? I want to hear them!

Field Gal Gear

Water, Water, Everywhere, But Where’d I Put My Drink?

Hydration is important: I don’t think we’re going to have anyone arguing* against staying hydrated.

*Yes, those people do exist. No, I’m not linking to any of them. Stay hydrated, people!

You really want to drink water before you feel so parched that you just can’t take another step. Preventing dehydration is key.

Just like accessing your Quick Grab Gear you want your water in easy reach. I will tell you about my progression through hydration systems. I went from not carrying nowhere near enough water to carrying four liters on every trip. It’s better to have it and not need it, than to need it and not have it.

  1. The Early Years: Inside the Pack Water Bottle

I was young! I didn’t know! How could I know? I know now: if I carry water inside of my pack, I won’t drink it unless I’m thirsty enough to haul off my pack, dig it out, drink, and then haul my pack back on. Water falls easily in the category of “out of sight, out of mind.” Same with sunscreen. SUNSCREEN NEEDS TO BE APPLIED MORE THAN ONCE A DAY! That’s the topic for a different post.

I did not drink enough water in my early years. I also didn’t want to be the gal always stopping to retrieve my errant water bottle, so I just jocked through thirst. Real field workers have souls of boiled leather and hard-baked dirt, right? I wanted to be the tough one. I wanted to belong. Did I mention I was young and didn’t know any better?

Note: Jocking through your discomfort in the field is a supremely bad idea.

If you’re working more or less in one area, an inside the pack water bottle is probably fine…as long as you use it! Remember it’s there. If you find yourself forgetting to drink, set a timer on your watch or phone. Remind yourself that your water bottle is waiting in your pack. It just wants to help you stay healthy.

  1. The Water Bottle Holster

It wasn’t until I started field work in British Columbia with my awesome colleague that I was introduced to stores that specialize in real outdoor gear, and that there are ways to carry your water bottle OUTSIDE of your pack.

Enter the MEC Water Bottle Holster

Bottle holster 2

I’ve already bemoaned the unavailability of the water bottle holsters in my Quick Grab Gear post, but I’ll bemoan it here as well: these things were awesome-sauce. They fit a one liter Nalgene water bottle like a glove (because they are made for just that). They have a Velcro strap that hooks on over the waist strap of your backpack SO YOU DON’T HAVE TO UNDO ANYTHING ON YOUR PACK TO ACCESS YOUR WATER. Just reach down for refreshment! I used to carry two one liter water bottles, one on each side in the holsters, with another two liters of water in my pack.

I didn’t think hydration could get much better than this. My life changed when I finally discovered…

  1. Hydration Packs

It wasn’t until I did consultancy work in a really hot and dry part of the world (we’re talking sustained +35°C) that I was introduced to hydration systems. I’ll admit: the idea of sucking on a hose like a baby sucking on a bottle seemed silly to me. I had to make myself try it because I really didn’t want to strap several liters of water to my waist. For reference, one liter of water equals one kilogram, or about 2.2 pounds.

Once I tried it, I was hooked. Osprey Manta 28 Men’s Hiking Hydration Pack was my first ever hydration system and I’ll hear nothing bad against it. I’ve been using it for eight years and I’ll use it until it falls apart on my back. It was spendy on a student budget but it was worth every penny.

Manta 28

While the design has changed a bit since I purchased mine, the Manta 24 and the Manta 34 designs have all of the features that I love in the Manta 28. The pack is roomy enough to serve as a kickin’ day pack, comes with its own rain cover, and the pocket system is extremely logical. There are even clips inside the deep side pockets to secure your keys!

The water reservoir is wide-mouthed so that it is easy to clean. If you happen to need to switch out the system, the pack will accommodate a three liter reservoir without any issues (it recommends 2.5 liters).

There is literally no excuse to not drink water with this system. The hose mouth piece comes with a little magnet that clips onto the chest strap. You don’t even need to stop to do a big drink: you can sip while you skip through the woods and over the hills.

Carrying water on my back freed up my Water Bottle Holsters to become my Quick Grab Gear holders, so that was another plus!

A Word About Expedition Packs and Hydration Systems

Most expedition backpacks available now come with an internal pocket to accommodate your hydration system of choice. My very first expedition pack, a MEC Brio 60L, did not come with a sleeve for holding a hydration system. Even so, I am saddened this pack is no longer available: its design was beautifully simple and it was AFFORDABLE (I paid $99 for mine).

I hit a super-duper sale and picked up an older model Gregory Deva 60. It comes with a mesh sleeve to hold a water reservoir and has a hose access slit near the pack lid.

Pro-Tip: the hydration mesh sleeve on my version of the pack is detachable (it may have changed since I bought mine, so take a look inside.) It attaches to the pack using a metal clip. This clip wore a small hole in the top of my water bag. I didn’t notice it when the pack is held upright on my back. It took me a few trips to realize why parts of my pack were damp after I would set the pack down on its side. A bit of Gorilla tape fixed the hole. Wrap that metal clip in foam to protect your water bag.

I also don’t use the external water bottle pockets on the Deva. It places the water behind me and out of my line of sight, invoking the whole “out of sight, out of mind” problem.

What I want from my Hydration System:

  1. Ease of filling and draining. Definitely choose one that is easy to fill, with a wide mouth or full top opening. I prefer the top-opening reservoirs that are closed with a slide seal over the round water bottle-like screw top openings. In fact, most of the hydration reservoirs that I see nowadays come with a slide seal closure. This opening style is superior not only for ease of filling, but
  2. Ease of cleaning and storing. You will want to be able to reach all of the nooks and crannies of your reservoir to thoroughly clean it and dry it out for storage. Storage + moisture = mold and mildew, and you don’t want to be greeted with a moldy mess when you pull your gear out of storage.
  3. Flat profile. Many reservoirs come with a stiffened side that rests against the inside back of the backpack. This is nice because it stops the reservoir from sagging and sitting like a lump in the bottom of your reservoir sleeve.

What about Conversion Kits?

MEC carries a conversion kit for turning a MSR Dromedary Bag to a Hydration System.

MSR bags

MSR kit

If you already have dromedary bags, this is an inexpensive option to make your own hydration system: the conversion kit is $25 CAD. I’ve tried it and it works well, but I have a couple of minor nitpicks.

One is that the bag has no rigidity, so it won’t lay flat against your back. This won’t be an issue if your backpack has a stiff back piece or a frame. If you have a frame-less pack, you may feel the bag bulging against your back while you hike.

Two, where the hose attaches to the spout opening of the reservoir sticks out, rather than pointing up and laying flat against the bag. This makes it easier for the hose base to snag and catch on other items in your pack. It could pull free, simultaneously soaking your pack and leaving you to suck water out of your spare socks. Thankfully the mesh reservoir bag in most packs is durable enough to protect the hose base from snags and leaks. I never had a leak, but I know someone who did.

Tell me about your can’t-live-without-it hydration system! Do you have a favorite brand? Did you ever have a hydration malfunction in the wilderness? I want to hear your field-tested recommendations and stories!

Field Gal Gear

Grab Your Gear!

I have 20 years of field work experience under my figurative belt. I know what I like, and I like functional outdoor gear! I’m a bit of a gear collector in that aspect: I try new things as my poor palaeontology (and now self-funded science communicator through Bird Glamour) budget allows. On Field Gal Gear you’ll see my trials and triumphs in trying out the camping and hiking gear I used for field work. Of course, these are all of my personal preferences: you may like certain gear for your reasons and that’s all cool.

An ever-evolving process was refining my Quick Grab Gear system. What is my Quick Grab Gear? Rite-in-the-Rain notebook, mechanical drafting pencil – and I’ll argue that they are THE BEST writing utensil I have ever used outdoors on waterproof paper – compass, GPS unit, flagging tape, Sharpie markers, pocket digital camera, photo scales, sunscreen face stick, and a small snack.

If you’re like many adventurers, you head out into the wilderness with a backpack. On expedition-length adventures you will have an expedition-sized pack. We’re talking a +60 L pack that contains everything you’ll need for the next days: shelter, water, food, sleeping bag and pad, a change of clothes, rain gear, and tools to do your job. Chances are your pack will be mighty in weight.

I have two expedition packs that I use interchangeably. My first ever pack was a MEC Brio 60L (no longer available). My other pack is an older model Gregory Deva 60.

Imagine this: you’re on a field survey and you see something that you need to document. You need to do it quickly and efficiently: daylight is burning. If your Quick Grab Gear is in your big expedition pack, you need to take off that pack. And then put that pack back on. And take it off. And put it on. Tedious, right?

I’ve learned a hard truth about myself: I’m supremely lazy (I prefer to think of it as maximizing my efficiency.) I am less likely to go through the motions of accessing my Quick Grab Gear on a long hike if I have to haul off and on my expedition pack ad nauseum. Physically I can do it, and do. Mentally…sometimes it’s a bit much.

I’ve experimented with various auxiliary carrying systems to keep my Quick Grab Gear handy without the bother of de-packing. Here are my experimental successes (and abject failures).

  1. The Photography Vest

Photographers are veterans of the Quick Grab Gear world. They have to be: those amazing photographic opportunities won’t wait for you to haul off your big pack just so you can take a pic.

Pros: It has pocketses, precious! Lots of zippered and Velcro-ed pockets! Of various sizes! Photographer’s Vests are usually made of lightweight material, so they won’t add a lot of weight themselves (what you pack in them is up to you, weight-wise) and will dry out quickly when (not if, when) they get wet.

Cons: You’ll be wearing your backpack OVER TOP of the vest. If you’re using an expedition pack with a padded waist trap (a must!) you lose access to any pockets covered by those straps. Also, I haven’t found a water-repellent or waterproof version of this vest. You can wear it under your rain jacket, but then you have the hassle of undoing your pack and then unzipping your protective rain gear to access your pockets. Oh, and any gear in your pockets is going to get wet if you wear the vest as your outer (accessible) layer.

Example of a light photography vest here: https://www.bhphotovideo.com/c/product/196102-REG/Humvee_by_CampCo_HMV_VS_K_L_Safari_Photo_Vest_Large.html

vest

  1. The Side Satchel

My very first purse was a small side satchel from Mountain Equipment Co-Op (MEC). The MEC brand side satchel is no longer available (I bought it over a decade ago), but this bag is the closest in terms of style and pockets. Oh, and I only spent $30 on my MEC version because it was on sale at the time. https://www.mec.ca/en/product/5063-893/Lima-Shoulder-Bag

I thought that the side satchel would be THE solution. All I would have to do is sling the satchel over my shoulder and then put my pack on! The weight of the pack would keep the satchel strap from moving around. I was feeling pretty proud of myself for the first few kilometers (cue the ominous music.)

NOTHING stopped that satchel strap from sliding around. It defied the laws of physics and went EVERYWHERE except where it was supposed to be, which was on my shoulder. I was stubborn: I made it work for three full-day expeditions, but soon abandoned this solution.

  1. The Fanny-Pack/Waist Pack

“OK, shoulder straps,” I said. “I don’t need you! I’ll put everything on my waist!”

In saunters the Fanny-Pack.

Fanny Pack Dork
GIF from the series “How I Met Your Mother.”


Fanny Pack Dork 2
GIF from the series “How I Met Your Mother.”

I was way too invested in having this work, which made my disappointment that much greater.

Do you see the problem?

Expedition packs have a waist strap. Waist packs have a waist strap.

Layering the backpack strap over the fanny pack strap, plus the buckles for each strap, made for A LOT of waist chafing. It was functional, but uncomfortable. Do not EVER downplay your physical comfort with field gear. You’ll end up hurting yourself.

Fanny Pack 1

Now I use this waist pack for cross-country skiing.

  1. The Water Bottle Holder!

After cursing the existence of all waist straps, I finally decided to lean into making the most of my backpack’s waist strap.

Behold the MEC Water Bottle Holster! https://www.mec.ca/en/product/5038-399/Water-Bottle-Holster (no longer available.)

Bottle holster 2

REI has a similar item, but it’s missing the cinch-top to keep your gear inside.

Before I switched to a hydration system, I had two Nalgene water bottles holstered to my waist strap. I re-purposed them for Quick Grab Gear. One holds my notebook, pencils, and photo scales (if I’m not wearing cargo pants, see below) and the other holds my other gear. Their strong polyester material meant they were wear-and-tear resistant, and they dried out quickly in wet weather!

  1. Cargo Pants: The Photography Vest of Pants!

Friends, I LOVE Ex Officio Men’s Nio Amphi Pants for field work: they are quick-drying, protect you from the sun, and best of all are the SUPER LARGE AND DEEP SIDE POCKETS. https://www.campsaver.com/exofficio-nio-amphi-pant-men-s.html

Ex officio pants

Since I love them so, it came as no surprise to me that they were discontinued.

The side pockets EASILY fit a geological Rite-in-the-Rain field book with room to spare. Camera? GPS? Small hand-samples of specimens? These pockets say “No problem, Buddy! I’m here for you!” I have abused these pants for years and they keep coming back for more. Rest in Peace, Ex Officio Men’s Nio Amphi Pants. You were the Emperor of Lightweight Field Pants.

Tell me about your field gear solutions for your Quick Grab outdoor Gear! What worked? What didn’t? What are your favorite brands? What are they meant for…and what do YOU use them for?