
If you weren’t exposed to, or didn’t have the opportunity to experience – outdoor activities, it can be a steep learning journey to find out what works and what doesn’t. I didn’t grow up in an outdoor-gear family. We spent A LOT of time outside, but that was because I grew up in a rural area. We didn’t go on camping trips or epic hikes that required specialized gear. When I started doing palaeontology work in 1997, about 23 years ago…
…is it really 23 years? My calendar must be incorrect. The 90s were only ten years ago, right? RIGHT?!?
Anyway, when I started doing field work AN UNSPECIFIED NUMBER of years ago, my first ever field backpack was a Coleman insulated day pack that my family gave me for Christmas. It was a great idea: they wanted me to be able to keep my lunch cool in the badlands of Alberta.
- My Very First Outdoor Backpack
Here’s an image of a Coleman backpack cooler. My circa 1997 pack did not have hip/waist straps, bottle holder, gear webbing, or multiple pockets: it claimed to be nothing more than it was, which was a cooler with backpack straps.

It worked! The field work was a series of day trips. We returned to the base station each night, and we never had to hike several kilometers to anything. The pack did its job, and I used it until it fell apart in 1999. By the time I started doing field work in Montana during my undergraduate degree, I needed a new pack.
- My Budget Backpacks
I was on a VERY TIGHT budget during my undergraduate studies. Example: I tried to keep my meal costs below $5 per day. I ate A LOT of Campbell’s Tomato Soup and oatmeal (not mixed together: I’m not a monster). I added Ramen noodles to the soup when I wanted something fancy. My idea of eating out was 99 cent bean burrito night at Taco Bell. I was not going to throw serious money at a serious backpack. I went with the $30 book bags at the university book store because it was what I could afford at that moment.

Here’s an example of a book bag backpack, the MEC Process Bookbag. Budget-friendly and roomy enough for your electronics and books, it’s great at what it is designed to do, which is to carry your electronics and books. That’s it. Notice the lack of waist straps? It is NOT meant for an expedition-length outdoor survey. Expecting a book bag to do more than a book bag does is unfair in terms of a performance review.
I made my book bags work. I crammed those packs full of everything I needed for a full day of excavating and several kilometer surveys. I NEVER connected my neck, shoulders and back pain with the design of my pack. I just thought it meant that I wasn’t tough enough. If I kept at it, I would toughen up, right? Was I ever wrong!
I didn’t know any better. I didn’t know there were actual expedition packs that are designed to take the weight off of your shoulders and transfer it to the main load-bearing parts of your body: your hips and legs. It’s why you always hear “Lift with your legs, not your back!”
Between 1999 and 2003, I blew through five book bags in five years. At a minimum of $30 per bag, I spent $150 (likely more) on backpacks. Had I known; I could have dropped that coin on one bag that would last me several years. Had I known. You end up spending MORE money on cheap gear over time than you will investing in a pack. If you’re cash-strapped, you have no choice: you just don’t have $150 or more laying around. It’s bloody expensive to be poor.
- My First Serious Big-Girl Backpack
In 2003 I switched projects. My new colleague took one look at what I was using for a backpack and said “Dear God, that’s not your pack, is it? Nope, we’re going shopping tomorrow!”
That was my first-ever trip to an outdoor gear store, Mountain Equipment Co-Op.
There were three key features my colleague educated me on:
- PADDED WAIST STRAPS. These are they key feature that helps you carry the weight of your pack on your hips (as long as your pack is sized properly.)
- PACK FRAME. Does your pack hold its shape, especially the part that rests right against your back? This is super important for keeping the contents of your pack from digging into your back, because the frame holds the gear slightly away from your resting directly on your spine.
- HOW DOES IT FEEL? Any respectable outdoor store will help you size your pack and let you test it out in-store under weight. They have sandbags that you can load into your pack and take it on a jaunt around the store. If the store has an outdoor footwear section (they usually do), they should also have a sloped ramp you can walk on. That will give you a good feel for how your pack handles when you’re going uphill or downhill (it matters!)
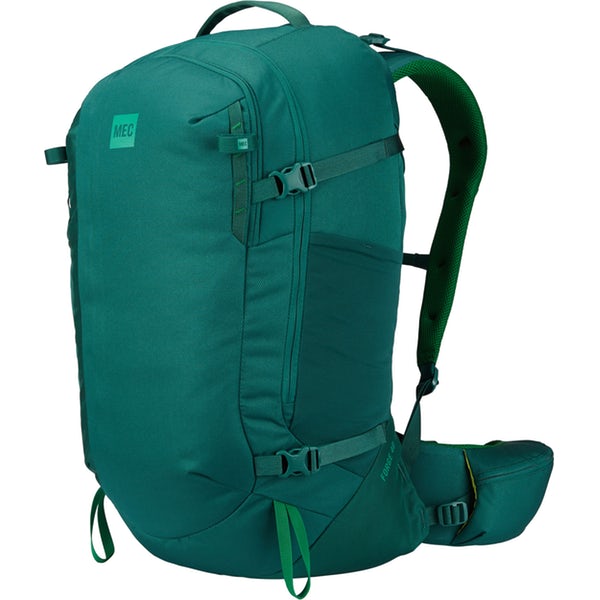
This MEC Forge 40 Backpack is similar to the day pack I purchased seventeen years ago on super-duper clearance sale. It’s still one of my active day packs.
I was in backpack heaven! What a difference a pack with waist straps and a frame made! Although we were only doing day expeditions, at the end of the day we had to hike fossil samples up a fairly steep hill. We started off calling it The Hill of Pain. By the end of the field season we were so used to the hill that we renamed it the Hill of Mild Discomfort. I had much more painful hills in my future.
- My First Expedition Backpack
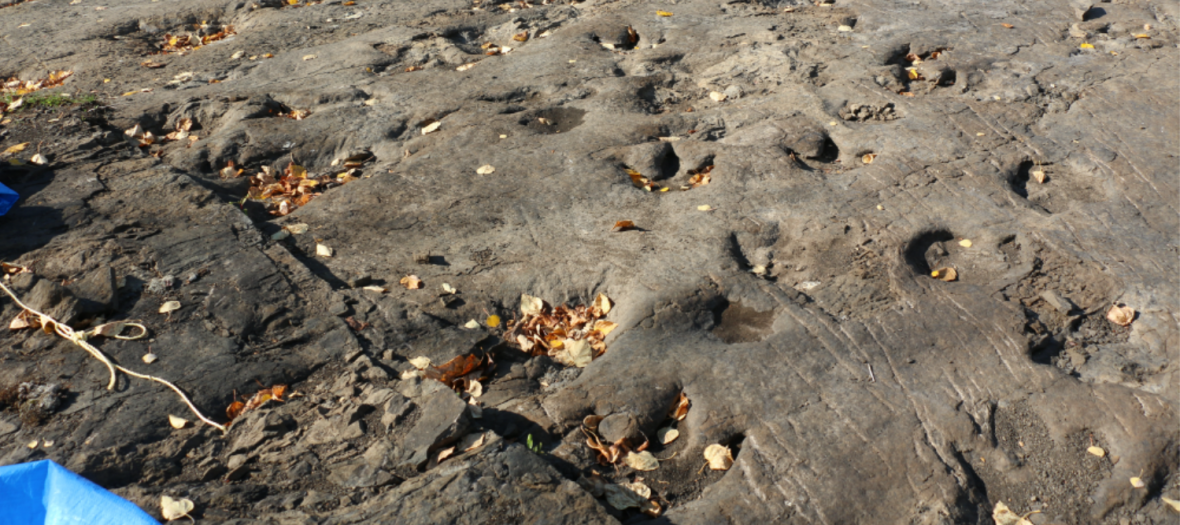
I was soon doing in surveys and expeditions that required hiking with a load of camping gear, tools, and recovered fossil samples. Fossils and gear are heavy!
This requires an expedition pack. I bought my very first expedition backpack in 2004: the MEC Brio 60 (no longer available).
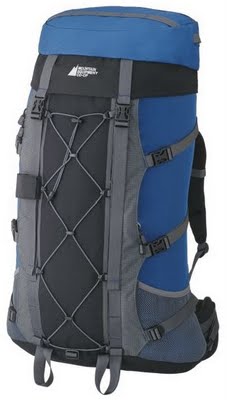
I love this pack! I STILL use it! It keeps coming back for more, even after all of the horrid abuse I have inflicted upon the fabric of its soul. It was on sale for $99 when I bought it. It is very simple in its design. The features that I love:
- Generously padded waist straps
- Removable pack frame (it’s a little tricky to get back in place)
- Simple interior partitioning
- Side access zipper for the main compartment
- Removable top lid with built-in waist straps
The Brio 60 is not a light pack when its empty because of the pack frame, but that frame is essential. We only had to carry fossils from their discovery site to a cache for helicopter pick-up, but first we had to CARRY them to the cache. The heaviest fossil I put in my pack was over 70 lbs. My colleague hauled a dinosaur thigh bone in his bag that weighed over 180 lbs over a three-kilometer trail (not recommended: he was looking a little green at the end of that haul). These packs get the job done.
- My First Expedition Backpack Designed for Women
I had tiny issues with the Brio 60. I felt a decent amount of my pack’s weight on my shoulders no matter how I adjusted the waist and shoulder straps. You’re never going to avoid carrying some of your pack’s weight on your shoulders. There are newer backpack designs that do this better, and backpacks designed for women have this as a main feature.
I took advantage of a backpack sale and bought a Gregory Deva 60. I went all in and used this pack for the first time on a 5-day hike-in fossil survey. I was not disappointed!
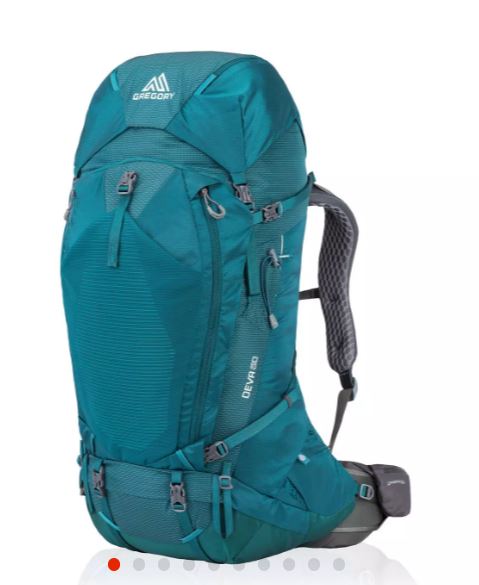
The compartments make sense! There is a roomy main compartment with the option of partitioning off a smaller lower compartment for a sleeping pad and bag. There are two roomy side pockets, and a deep front pocket which I used for storing my on-the-go snacks and the resulting snack trash (pack it in, pack it out!) The top pocket fits snugly over the main opening whether the pack is full or empty. The pack is also designed to use a 3- liter hydration system (purchased separately).
The best features are the lightweight pack frame, structured shoulder straps, and padded waist straps.
My pack had a lot in it! An Outdoor Research Alpine Bivy, sleeping bag liner, sleeping bag overbag, a couple of changes of thermal leggings and shirts, several pairs of wool socks (always wool socks!) rain jacket, three liters of water (we also packed in a water purification system because we knew that water would be available on site), food for five days (including a small bottle of homemade mead), field book, GPS, bottles of glue, digital camera, hiking pole, rock hammer, first aid kit, rain jacket, pack rain cover…I had to live out of this pack for five days.
My pack was still heavy, but it felt good. There was literally a weight being lifted from my shoulders!
What is your favorite large backpack? Do you have an old trusty pack that just won’t quit? Do you have backpack horror stories? I want to hear them!