
Hydration is important: I don’t think we’re going to have anyone arguing* against staying hydrated.
*Yes, those people do exist. No, I’m not linking to any of them. Stay hydrated, people!
You really want to drink water before you feel so parched that you just can’t take another step. Preventing dehydration is key.
Just like accessing your Quick Grab Gear you want your water in easy reach. I will tell you about my progression through hydration systems. I went from not carrying nowhere near enough water to carrying four liters on every trip. It’s better to have it and not need it, than to need it and not have it.
- The Early Years: Inside the Pack Water Bottle
I was young! I didn’t know! How could I know? I know now: if I carry water inside of my pack, I won’t drink it unless I’m thirsty enough to haul off my pack, dig it out, drink, and then haul my pack back on. Water falls easily in the category of “out of sight, out of mind.” Same with sunscreen. SUNSCREEN NEEDS TO BE APPLIED MORE THAN ONCE A DAY! That’s the topic for a different post.
I did not drink enough water in my early years. I also didn’t want to be the gal always stopping to retrieve my errant water bottle, so I just jocked through thirst. Real field workers have souls of boiled leather and hard-baked dirt, right? I wanted to be the tough one. I wanted to belong. Did I mention I was young and didn’t know any better?
Note: Jocking through your discomfort in the field is a supremely bad idea.
If you’re working more or less in one area, an inside the pack water bottle is probably fine…as long as you use it! Remember it’s there. If you find yourself forgetting to drink, set a timer on your watch or phone. Remind yourself that your water bottle is waiting in your pack. It just wants to help you stay healthy.
- The Water Bottle Holster
It wasn’t until I started field work in British Columbia with my awesome colleague that I was introduced to stores that specialize in real outdoor gear, and that there are ways to carry your water bottle OUTSIDE of your pack.
Enter the MEC Water Bottle Holster
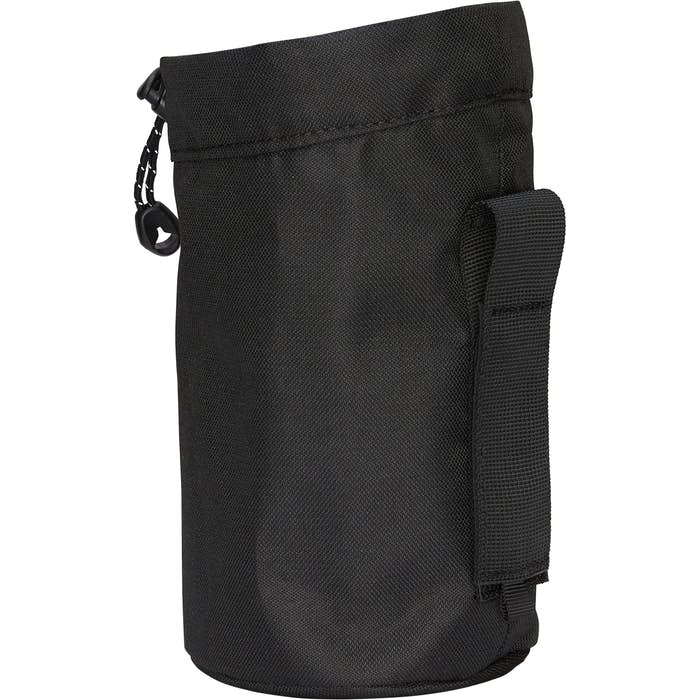
I’ve already bemoaned the unavailability of the water bottle holsters in my Quick Grab Gear post, but I’ll bemoan it here as well: these things were awesome-sauce. They fit a one liter Nalgene water bottle like a glove (because they are made for just that). They have a Velcro strap that hooks on over the waist strap of your backpack SO YOU DON’T HAVE TO UNDO ANYTHING ON YOUR PACK TO ACCESS YOUR WATER. Just reach down for refreshment! I used to carry two one liter water bottles, one on each side in the holsters, with another two liters of water in my pack.
I didn’t think hydration could get much better than this. My life changed when I finally discovered…
- Hydration Packs
It wasn’t until I did consultancy work in a really hot and dry part of the world (we’re talking sustained +35°C) that I was introduced to hydration systems. I’ll admit: the idea of sucking on a hose like a baby sucking on a bottle seemed silly to me. I had to make myself try it because I really didn’t want to strap several liters of water to my waist. For reference, one liter of water equals one kilogram, or about 2.2 pounds.
Once I tried it, I was hooked. Osprey Manta 28 Men’s Hiking Hydration Pack was my first ever hydration system and I’ll hear nothing bad against it. I’ve been using it for eight years and I’ll use it until it falls apart on my back. It was spendy on a student budget but it was worth every penny.
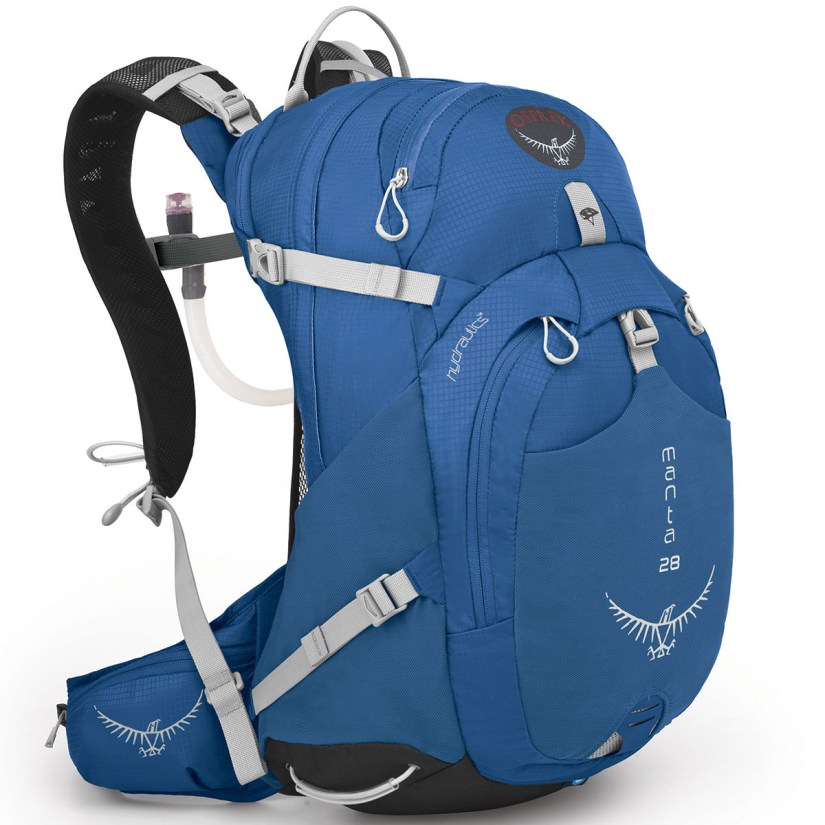
While the design has changed a bit since I purchased mine, the Manta 24 and the Manta 34 designs have all of the features that I love in the Manta 28. The pack is roomy enough to serve as a kickin’ day pack, comes with its own rain cover, and the pocket system is extremely logical. There are even clips inside the deep side pockets to secure your keys!
The water reservoir is wide-mouthed so that it is easy to clean. If you happen to need to switch out the system, the pack will accommodate a three liter reservoir without any issues (it recommends 2.5 liters).
There is literally no excuse to not drink water with this system. The hose mouth piece comes with a little magnet that clips onto the chest strap. You don’t even need to stop to do a big drink: you can sip while you skip through the woods and over the hills.
Carrying water on my back freed up my Water Bottle Holsters to become my Quick Grab Gear holders, so that was another plus!
A Word About Expedition Packs and Hydration Systems
Most expedition backpacks available now come with an internal pocket to accommodate your hydration system of choice. My very first expedition pack, a MEC Brio 60L, did not come with a sleeve for holding a hydration system. Even so, I am saddened this pack is no longer available: its design was beautifully simple and it was AFFORDABLE (I paid $99 for mine).
I hit a super-duper sale and picked up an older model Gregory Deva 60. It comes with a mesh sleeve to hold a water reservoir and has a hose access slit near the pack lid.
Pro-Tip: the hydration mesh sleeve on my version of the pack is detachable (it may have changed since I bought mine, so take a look inside.) It attaches to the pack using a metal clip. This clip wore a small hole in the top of my water bag. I didn’t notice it when the pack is held upright on my back. It took me a few trips to realize why parts of my pack were damp after I would set the pack down on its side. A bit of Gorilla tape fixed the hole. Wrap that metal clip in foam to protect your water bag.
I also don’t use the external water bottle pockets on the Deva. It places the water behind me and out of my line of sight, invoking the whole “out of sight, out of mind” problem.
What I want from my Hydration System:
- Ease of filling and draining. Definitely choose one that is easy to fill, with a wide mouth or full top opening. I prefer the top-opening reservoirs that are closed with a slide seal over the round water bottle-like screw top openings. In fact, most of the hydration reservoirs that I see nowadays come with a slide seal closure. This opening style is superior not only for ease of filling, but
- Ease of cleaning and storing. You will want to be able to reach all of the nooks and crannies of your reservoir to thoroughly clean it and dry it out for storage. Storage + moisture = mold and mildew, and you don’t want to be greeted with a moldy mess when you pull your gear out of storage.
- Flat profile. Many reservoirs come with a stiffened side that rests against the inside back of the backpack. This is nice because it stops the reservoir from sagging and sitting like a lump in the bottom of your reservoir sleeve.
What about Conversion Kits?
MEC carries a conversion kit for turning a MSR Dromedary Bag to a Hydration System.

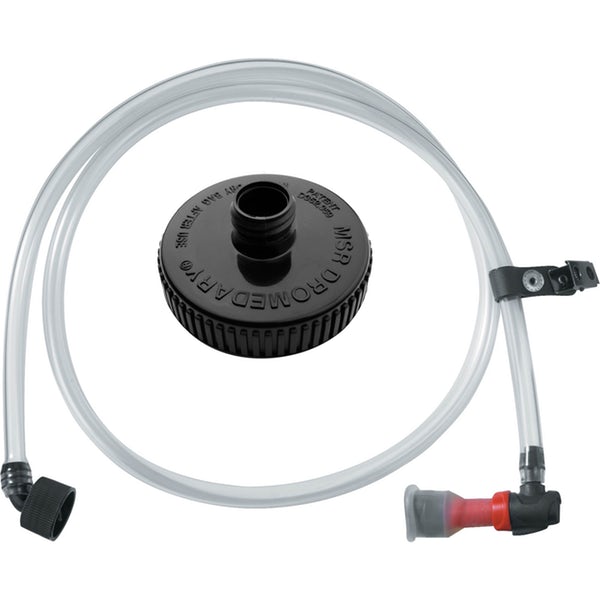
If you already have dromedary bags, this is an inexpensive option to make your own hydration system: the conversion kit is $25 CAD. I’ve tried it and it works well, but I have a couple of minor nitpicks.
One is that the bag has no rigidity, so it won’t lay flat against your back. This won’t be an issue if your backpack has a stiff back piece or a frame. If you have a frame-less pack, you may feel the bag bulging against your back while you hike.
Two, where the hose attaches to the spout opening of the reservoir sticks out, rather than pointing up and laying flat against the bag. This makes it easier for the hose base to snag and catch on other items in your pack. It could pull free, simultaneously soaking your pack and leaving you to suck water out of your spare socks. Thankfully the mesh reservoir bag in most packs is durable enough to protect the hose base from snags and leaks. I never had a leak, but I know someone who did.
Tell me about your can’t-live-without-it hydration system! Do you have a favorite brand? Did you ever have a hydration malfunction in the wilderness? I want to hear your field-tested recommendations and stories!
