Hello, Dear Readers!
Part of the research that I do on Cretaceous-age bird tracks (a.k.a. individual footprints) and trackways involves me becoming very familiar with all kinds of bird tracks, not just the fossilized ones. Tracks and trackways of small creatures are ephemeral: they do not last very long because they are easily trampled or eroded away, or they dry and crumble, blowing away on the winds of time.
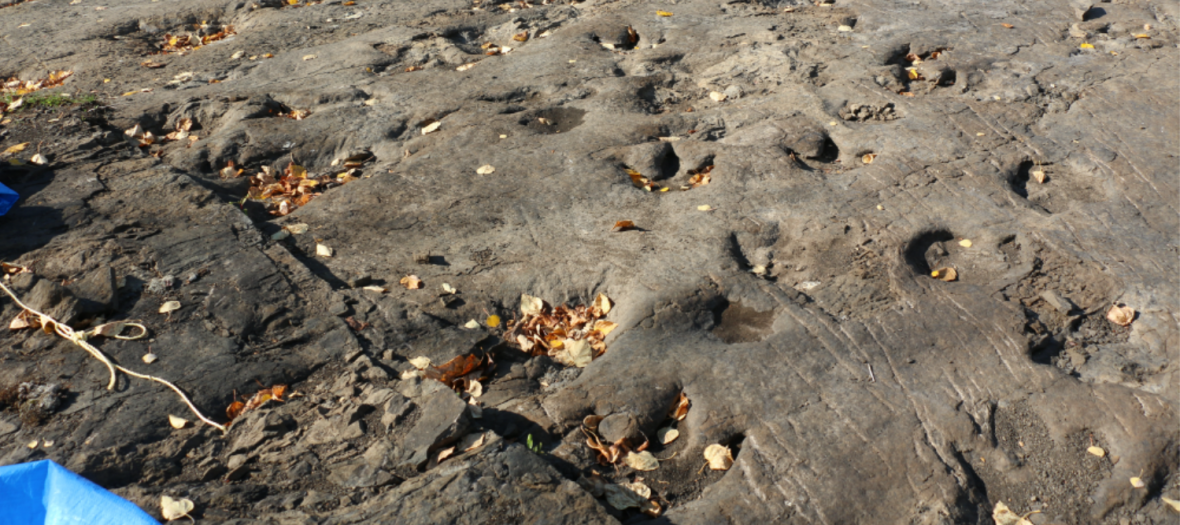
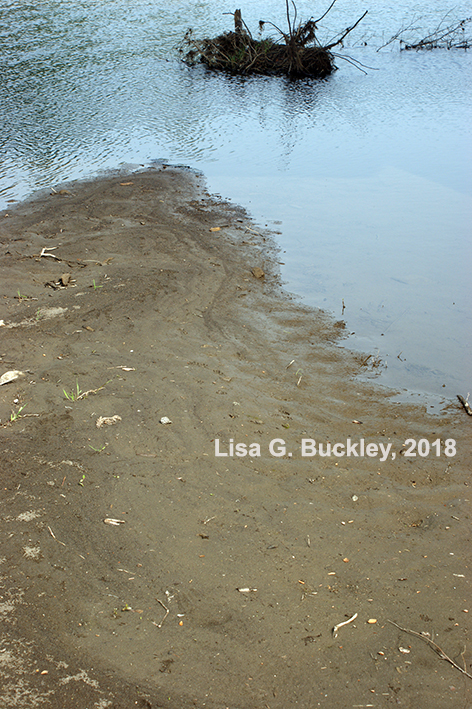
Most of the Cretaceous-age bird tracks that I study are the tracks of birds that were the Cretaceous-equivalents (paleo-ecologically speaking) of our present-day shorebirds and wading birds. These are birds that spent a great deal of time along Cretaceous beaches, lakeshores, and river banks, or that waded in shallow waters and left tracks in the soft, damp sediment (usually sand or silt.)
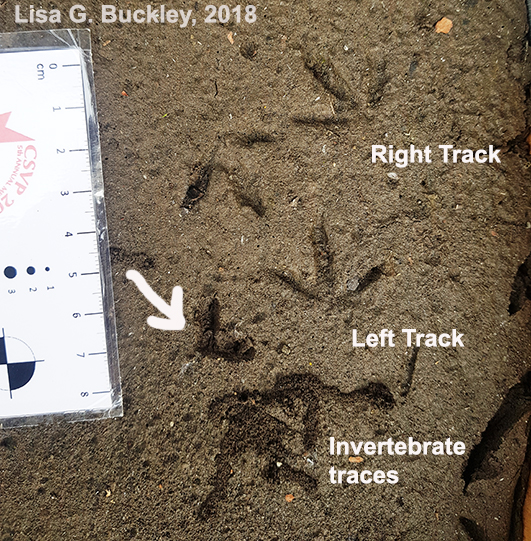
In a very general sense, Cretaceous-age shorebird and wading bird tracks have a lot of similarities with their present-day representatives. They are generally small, meaning they are less than 10 cm from the “heel” (which is really the metatarsophalangeal pad area, because birds walk on their toes only) to the tip of the middle toe. These tracks tend to have three forward-facing toes and sometimes have a single backward-facing toe. This foot shape is called “anisodactyl.” These tracks also have fairly narrow toe (or digit) impressions. We know that these Cretaceous-age shorebirds and wading birds strolled around in environments similar to our present-day shorebirds and wading birds (Kim et al. 2012 – Paradise of Mesozoic Birds.)
Our present-day wild shorebirds and wading bird populations and their environments provide a living laboratory in which to better understand how Cretaceous-age shorebirds and wading birds interacted with their paleoenvironments. So, how do I go about studying present-day bird footprints?
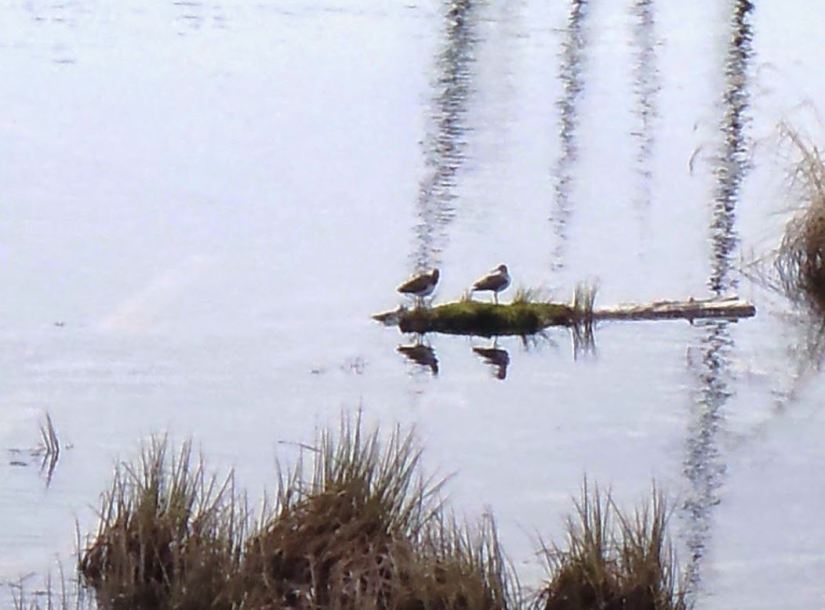
First, spend a lot of time sitting in shorebird environments, just watching birds from a distance. Watching from a distance is important: you don’t want to do too many things that will “weird out” the shorebirds. I want the birds to act as “normal” as possible so that their tracks and trackways are as “normal” as possible. I want to see how birds directly interact with their environment when they are going about their birdy lives. I also don’t want to harass the shorebirds. Although I do not chase or pester shorebirds, they do know I am there. How could they not notice that strange, chemical-smelling (from insect repellent) biped crunching around in the bushes? It’s just a matter of being as much of a non-entity as possible. Some species seem very relaxed with a large biped in their midst (Spotted Sandpipers). Some species will not appear until I either leave or spend several immobile hours observing (Solitary Sandpipers).
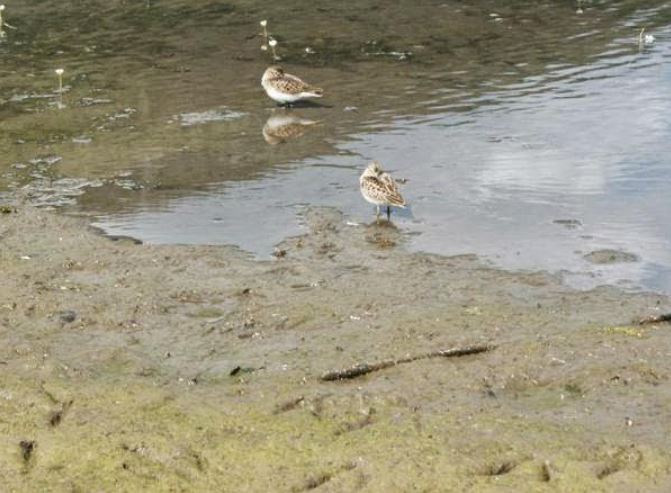
Second, I identify the birds that I see so that I know what is making the tracks. Part of my work is trying to link the trackmaker (the bird) to the shape of the tracks they make. The more precise I can get with the link, the more accurately we can say how many different types of shorebirds were running around Cretaceous-age shorelines. The more present-day bird tracks I can study, the better.
Let’s jump to the “Hey, there’s a shorebird trackway!” moment. Shorebird tracks are finite phenomena, which is a problem for research: someone should be able to double-check my studies in the future, but they can’t if the trackways have washed away or crumbled to dry sand. I need a stable record of the tracks I measure. I’m only still learning the proper techniques for taking useable photogrammetry photos of small tracks (link to Bureau of Land Management PDF of Neffra Matthews work on digitizing track sites).
What I do is make plaster replicas of bird tracks.
[WARNING SIRENS SOUNDING] ICHNOLOGIST’S RANT: Do not ever, EVER, pour any kind of plaster into a fossil track. There are likely exceptions to this but those are case-by-case instances, and the action should be done by an experienced paleontologist. Every year fossil tracks are irreversibly damaged by someone using plaster. See this article about the tracks on Scotland’s Dinosaur Isle, and a similar case near Moab in Utah. Even if it is someone who simply wanted a souvenir, actions outweigh intent, and the action is damage to irreplaceable heritage.
Why is plaster on a fossil track surface a bad idea? Fossil track surfaces are HARD. Plaster sets up HARD. Hard plaster does not dislodge from under hard rock undercuts, overhangs, and jagged surfaces. Here’s what happens: either the plaster cast gets stuck, breaks and remains inside the track, or the uneven parts of the track break and pieces are ripped up with the plaster cast. Please please PLEASE leave fossil track replica-making to the professionals. Support your local museums and purchase one of the track replicas they provide. [END ICHNOLOGIST’S RANT]*
*In case you are wondering, a version of these two paragraphs will appear in every post I write on using plaster on present-day tracks.
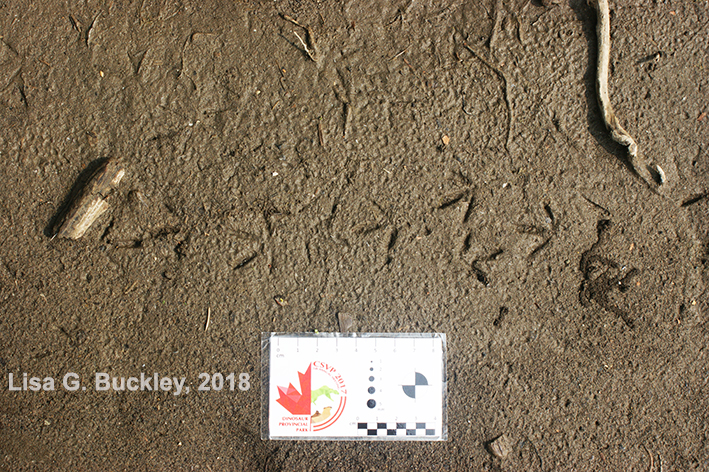
Now that we have a bird trackway to cast (this particular trackway looks a lot like a plover trackway, likely a Killdeer), we need a procedure for how to 1. successfully, and 2. CLEANLY make a plaster replica out in the wilds. You might be making casts in areas to which you cannot readily drive: you’ll have to hand-carry or backpack your equipment to the site.
Here are the steps I follow for one way to make a plaster bird trackway replica in the wild. Of course, this would work for the present-day tracks of other animals – you might need more or less plaster depending on the size of the tracks and trackway. One of the benefits of bird tracks is that they are small!
HOW TO MAKE A BIRD TRACKWAY REPLICA OUT OF PLASTER OF PARIS
- Find a shorebird-friendly environment! These areas may be very wet and difficult to walk on, so be careful not to sink in and get stuck! Find your bird trackway. Take lots of reference photos with a scale in the photograph.
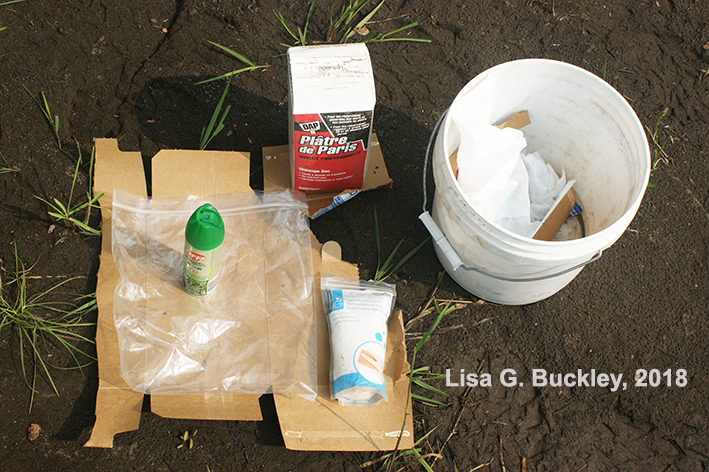
2. Find a dry(ish) stable area to unload your track casting equipment! Equipment you will need:
- A 3-gallon bucket. All of my casting gear will fit inside of this bucket, which then goes into my large backpack or I hand-carry it. This could also be used as your mixing bucket if you are sure that it doesn’t have any cracks or leaks. This bucket can also be used to scoop up water (if your casting area has available water).
- Latex or nitryl gloves. Hand-mixing plaster is HARD on the hands: it can irritate your skin. It really dries out my skin and nails. Also, gloves can be taken off, whereas hands need to be washed (you won’t have a sink in the wild). Pro-tip: I use gloves that are one size too large so that I can easily take them off and put them back on. You can also use multiple pairs of gloves if you have them.
- Dust mask. Plaster of Paris is very dusty. You do not want to inhale it.
- Safety glasses. Learn from my mistakes, Dear Readers. I have glopped plaster into my eyes. An organic-rich stream is not a substitute for an eye-wash station. Also, a backpack eyewash bottle with clean water is a really good idea to have on you.
- Garbage bag(s). This is essential since you want to keep your mixing area clean. Your garbage bag will be your containment system.
- Plaster of Paris. This is your casting material. Pictured is a 2 kg container. For this project, I will end up using about 1 kg of dry plaster total (half the container). You can purchase this plaster in many hardware stores.
- Plaster scoop. I used my hands on this trip, but a scoop (an old measuring cup works well) is highly recommended.
- Ziploc-style plastic bag. This is your mixing bag. This is a nice flexible container in which to mix small batches of plaster.
- Water. If your casting area doesn’t have standing or running water, you’ll have to bring your own. Plaster mix requires 2 parts plaster to 1 part water mix.
- Cardboard, duct tape, and a cutting instrument. This is what you will use to make a dam to keep your plaster from spreading all over the place.
- Strengthening fabric. This will be added to your second layer of plaster to add structural strength to the cast, as casts can be fragile. Materials that are best for making wild casts are strips of fiberglass matting (chop is VERY messy), burlap/jute, or cheesecloth. This time I used shredded cardboard – it worked!
- Felt-tipped marker. You will want to label your bird track cast so that you know the who, what, where, and when of your cast!
- Camera, photo scale, notebook. I always take reference photographs of bird tracks before I cast them. Once I make the cast, the original tracks are gone.
3. Label the trackway. The plaster cast is going to display a mirror image of the original tracks: what was in (a depression) will stick out, what looks left will appear on the right. It might be hard to tell what is a left track and a right track. I always choose one left track and scratch a small “L” for “Left” next to it. This “L” will show up in the final cast. That way I know for sure which tracks are from the left and the right, even if it looks reversed in the cast.
4. Make the cardboard dam. Cut strips of cardboard and tape the strips together to make one long cardboard strip. You can make it long enough to completely encircle the tracks that you want to cast if the ground is relatively flat (or if you accidentally mix your plaster on the runny side, which is OK.)

5. Place your cardboard dam on edge on the track surface. If there is a slope to the track surface, place the dam on the downslope side of the trackway. Gently press the edge of the cardboard dam into the sediment – make sure you’re far enough away from the tracks so that you don’t deform them when you press the cardboard into the sediment!
*6. Set up the plaster mixing station. Put on your safety gear (gloves, mask, glasses). Plaster of Paris has the same consistency of flour: it is dusty and It. Gets. Everywhere. Here’s how to keep your mixing area clean:
- Open up your big garbage bag so that it will act like a big bowl
- Place plaster container and mixing bag inside the garbage bag inside the garbage bag bowl.
Now, any plaster that spills out of your hands or scoop will fall into the garbage bag rather than on the ground.
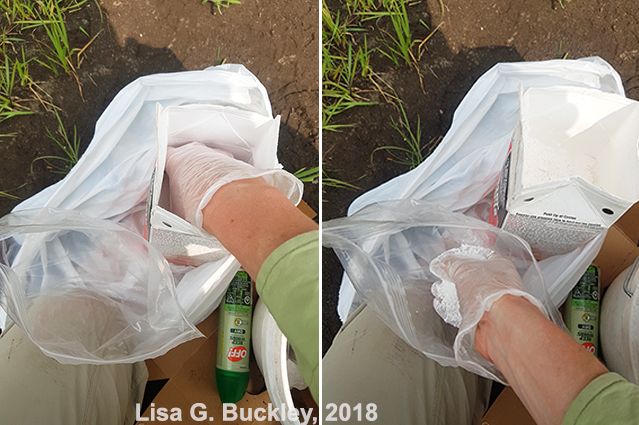
*7. Add water to the plaster. The recommended ratio of plaster to water is 2 parts plaster to 1 part water. You can measure it or eyeball it (I’ve done this so many times that now I eyeball it, but if you’re unfamiliar with plaster, I strongly recommend a measuring scoop.)
* Steps 6 and 7 can be reversed: you can also pre-measure out the water and add the plaster to the water. If you have a limited supply of either plaster or water, I strongly recommend using a measuring scoop so that you get the right ratio of plaster to water. It’s easy to accidentally add too much plaster to the water. From experience, it is better to make your plaster mix a little too runny. A runny mix will take a longer to set up, but it will capture all of the small details. If your mix is too thick, it may not settle into all of the small parts of the bird footprints. A thick mixture will also hold on to more air bubbles, which like to settle into the toes of bird tracks. Also, the thicker the plaster mix, the less time you have to work with it before it hardens.

8. Let the plaster soak into the water for a minute or two, then mix, mix, mix. You will want to make sure there are no lumps. Mixing plaster is a lot like using pancake mix. I like to mix plaster with my hands (WEARING GLOVES) so that I can feel for plaster lumps and break them apart with my fingers. Don’t worry: I don’t mix pancake batter using my hands.
9. Once the plaster is thoroughly mixed, tap the bottom of the bag several times. You’ll see a scum of air bubbles form on the top of the plaster. These air bubbles are the bane of plaster casts. Plaster will set up around these air bubbles, creating pockets of space that don’t preserve any of the track details. Use your fingers or your scoop to skim most of the air bubbles off of the surface. You can dispose of the scooped foam in your garbage bag.

10. It’s plaster pouring time! Small tracks on a fine-grained surface (like sand or silt) can be easily damaged. You want to pour the plaster as close to the track surface as possible so that you don’t make any pour marks on the surface. You also don’t want to pour directly on to the tracks for the same reason. Pour the plaster so that it gently runs into the tracks.
11. You have finished pouring the Detail Layer! Once you have covered all of the tracks that you want to cast with plaster, it’s time to wait for the plaster to set up. There some factors that will determine how much time this will take. If it’s hot and dry out, you’ll be ready to add the next plaster layer in as little as 20 minutes. If it is humid, cool, and if the surface is very damp, you might have to wait as long as half an hour to 45 minutes. Keep an eye on the plaster: I’ve had the local wildlife try to “investigate” the plaster!
12. Once the plaster is firm, but still damp to the touch, it’s time to add the support layer. First, prepare your support fabric. I used shredded cardboard. If you’re using cardboard, burlap, or fiberglass mat, moisten it so that it is damp, but not soggy or dripping.
13. Repeat Steps 6 and 7 to make a fresh batch of plaster. Add your strengthening fabric directly to the plaster. Mix the strengthening fabric into the plaster until it is thoroughly covered.
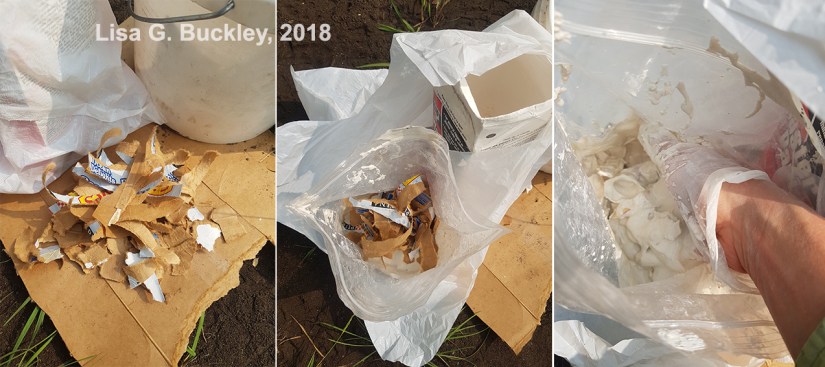
14. Spread the strengthening mix to the surface of the Detail Layer. Since the Detail Layer is still damp, it will be fragile, so be very gentle. Cover the entire Detail Layer with the Strengthening Layer. Let this layer set until it is dry to the touch.

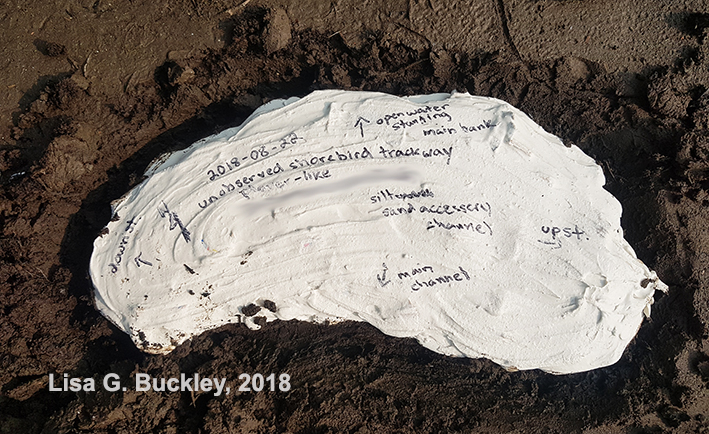
15. Once dry (30 minutes to an hour), it’s time to write down all of the information you can about the bird track cast. This will help to supplement any of the notes and photos that you took. Here is what I write on my track casts (as long as my pen works – if the plaster is too damp, it will clog your felt pen):
- Date,
- Name of the bird,
- Name of the area (or location coordinates),
- Orientation to the waterway: upstream, downstream, shore side, waterside,
- North direction,
- Your name(s),
- Any interesting details that you noticed in the trackway.
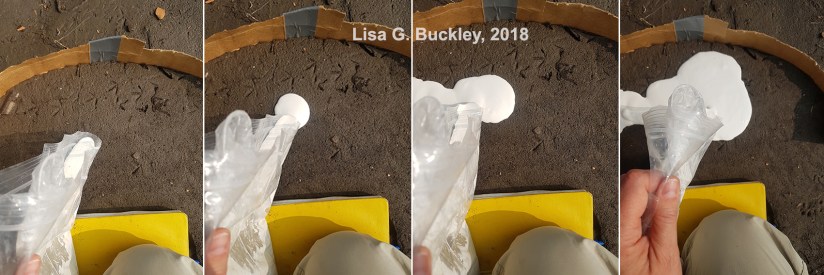
16. Once the cast is labeled, it is time to remove it from the surface! The damp sand and silt will suction the track cast to the surface, so you’ll need to dig around and underneath the cast to free it without breaking it.
17. CAREFULLY lift the plaster cast from the surface! There will be a lot of sand and silt sticking to the underside. You can remove big chunks of this sand and silt, but wait until you get back to the lab/classroom/home to clean the surface. The plaster may still be damp and fragile underneath that silt and sand.
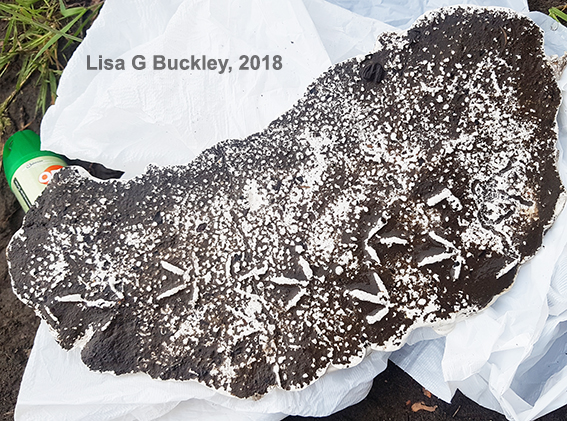
18. Your track cast is successfully lifted…but you are not finished yet! Make sure that you pick up any small pieces of dried plaster that might have dripped on to the surface. Pack up all of your garbage and tools in your carrying bucket. Find a safe way to carry your plaster cast. I usually end up hand-carrying it, or wrapping it up in a spare shirt or jacket and carrying it in my backpack.
19. When you get your track cast home, let it sit for two to three days to cure. Curing is different from hardening. Curing allows for all of the extra water not used in the chemical reaction to dry off. After the cast has cured, you can actually use water and a very soft sponge to gently remove extra sand and silt from cast so that you can see the tracks. No scrubbing or scraping with hard bristles!
I hope you find this How-To useful! If you have any questions about making present-day bird (or other critters) track casts, please feel free to contact me through this website! If you think this activity would be great for a classroom activity or want to get involved with this kind of bird ichnology, please let me know!

It’s a shame you don’t have a donate button! I’d most certainly donate to this fantastic blog! I guess for now i’ll settle for bookmarking and adding your RSS feed to my Google account. I look forward to brand new updates and will talk about this site with my Facebook group. Chat soon!
LikeLike